Over summer, I have such an abundance of herbs, its hard to believe that in winter they will all die back and I'll have to resort to using bought dried herbs again. This year I had a plan, I wanted to dry my own herbs, the aim was herb self-sufficiency!
I had borrowed an
Excalibur drier from a friend a few years ago and managed to dry some parsley, as well as tomatoes and apples, before I gave it back. Our thoughts on this drier were that it was HUGE and loud, but very efficient at drying. With our small kitchen, and an aim to mainly dry herbs rather than worrying about fruit (as we don't have access to any cheap/free fruit at the moment), I wanted to use something smaller (and therefore cheaper).
I did have a very brief attempt at air drying herbs, but in our humid climate, all I achieved was mouldy leaves!
As an early Christmas present for myself I bought the Sunbeam food dehydrator in December.
 |
| Sunbeam food dehydrator - "healthy and natural snacks"! |
I decided to start with the sage plant as it was in need of a good trim anyway. It turns out that
herbs actually grow better if they are pruned regularly, however its difficult to use all that summer growth and in the past much of it has ended up in the compost, or the herbs have been scragly, woody and out of control!
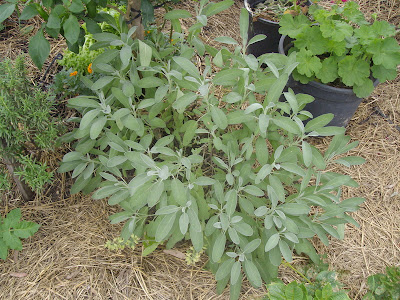 |
| Sage before... |
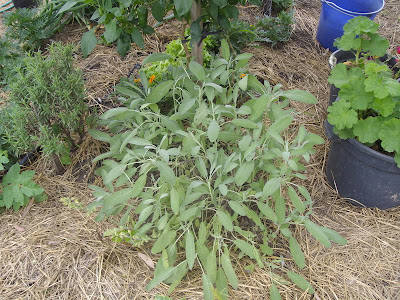 |
| ....and after the trimming |
First I washed the leaves, then spun them in the lettuce spinner, then arranged them in the drier......
 |
| Washing the sage leaves |
 |
| Spinning the sage leaves |
 |
| Loading the dehydrator |
 |
| Running the dehydrator |
The instruction booklet that came with the drier recommended 2-4 hours for drying herbs. After 4 hours the leaves were still not dry. At 9pm on the day of drying (having started around 10am), the leaves were still not dry! Now I'm not complaining, because I knew that I wasn't buying the best dehydrator on the market, I just wanted something that would get the job done eventually. I don't think I'll ever use it for fruit (although that uses a higher temperature setting, so it might work quicker).
Anyway, I turned off the dehydrator overnight and left the leaves in there to continue drying, then I turned it on for a few hours the next day until the leaves were dry. I wanted them to be crumbly dry, so that they would keep for a long time.
Having dried a large jar of sage, I decided to try oregano. This time I washed and spun the leaves the day before I put them in the dehydrator, so they were not as damp when I started the drier. I also used fewer leaves and so only needed 3 trays in the drier. I left the leaves on the stalks (as suggested by the user manual). This time drying didn't take quite so long, but was still run over a few afternoons until I was satisfied with the results. I can't decide whether leaving the stalks is a good idea, as that just seems like more plant material to dry and it can be more work to remove the dried leaves.
My plan is to keep drying herbs so that I have a good supply over winter and so that the herbs keep growing well over summer (with regular trims). So far I've dried oregano, basil, sage, thyme and mint.
 |
| The herbs I've dried so far.... |
 |
| and then I tried silverbeet, not sure what I'll use it for, but why not? |
Do you dry your own herbs? Or other foods?


Preparation is made easy. Thanks!
ReplyDelete